Windows NT 4.0 RAS Setup
1) In the “Control Panel” folder, click on the “Modem” icon and make sure that you have selected your modem and set the correct options.
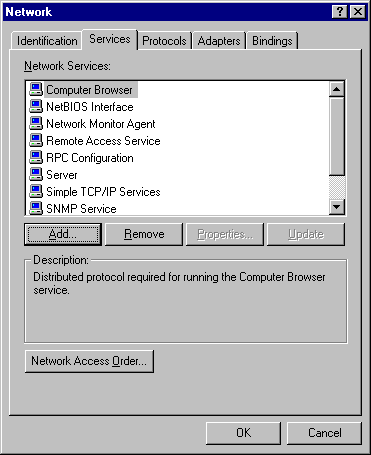
2) Open the “Control Panel” and click on the “Network” icon
3) Click on the “Services” tab.

Note : you may or may not see the “Remote Access
Service” line above depending on whether your PC has been
set up before
4) If you do not see the line click on “Add” button,
otherwise skip this next step.
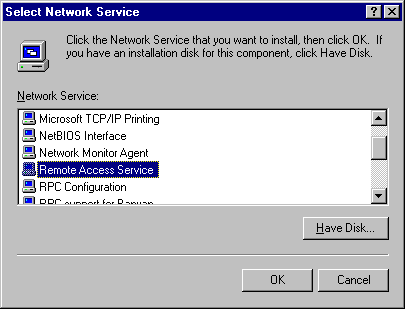
Now click on OK You will now be asked for the NT installation
CDROM and the system will copy over some files.
5) You will now be asked to select your modem.
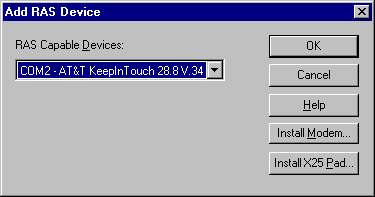
If you have previously configured your modem (step 1), then
you should see the modem listed as shown above. If so, then click
on
“OK”. If a modem does not show up then you should click
on “Install modem” to now go through selecting the
modem on your
computer (follow the wizard steps to select your modem type). For
the purposes of these instructions, we will assume that you
know how to set up the modem.
6) The screen below shows that you have selected the RAS modem
that you will be using
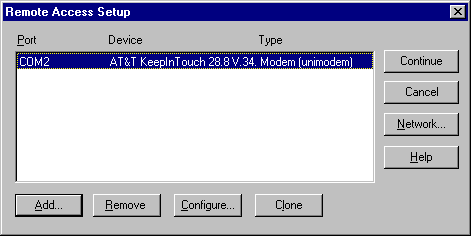
Click on the “Configure” button above.
7) Select the “Dial out only” option
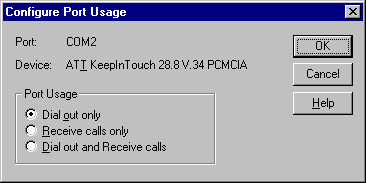
Click on OK above
8) You will now be shown the screen below
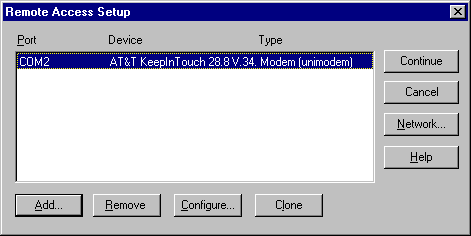
Click on “Network”
9) Select “TCP/IP” option and click on “OK”
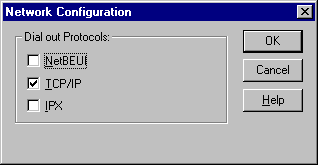
10) You will now be displayed the screen below
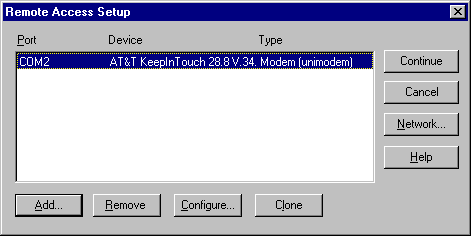
Click on the “Continue” button.
11) RAS is now configured on your PC.
12) You now need to set up your “Dial up Network”
properties for dialing into AIS.
13) Click on the “My Computer” icon and then click on
the “Dial up Networking” icon.
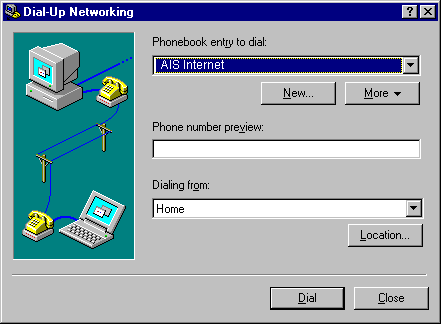
14) Click on the “New” button. Now type in any name
you want for this entry.
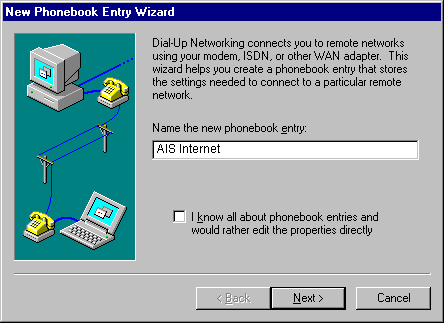
Click on the “Next” button.
15) In the screen shown below, select the options shown below.
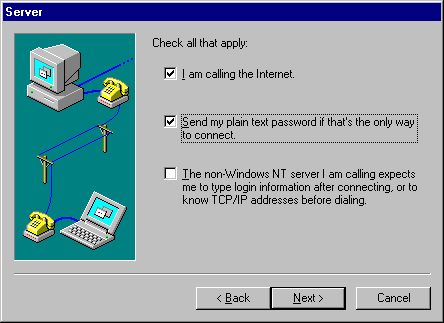
Click on the “Next” button.
16) Enter the phone number and area code (if it applies) of your
access number. You can also use alternate numbers if you have
multiple access numbers.
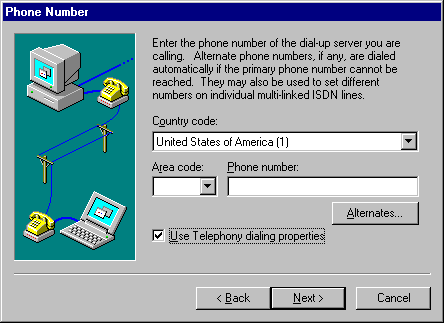
Click on the “Next” button.
17) Click on the “Finish” button below.
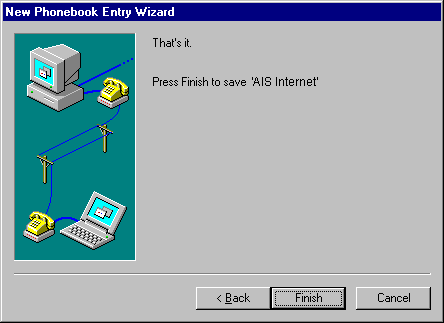
18) At this point you have now set up an entry for AIS.
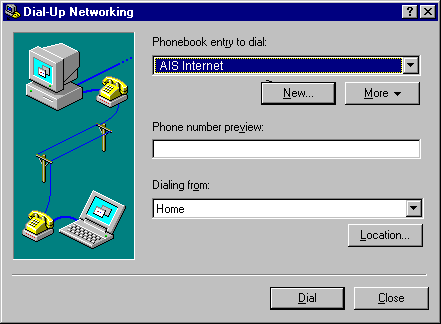
19) Click on the “More” button and select the “Edit Modem and entry properties” entry
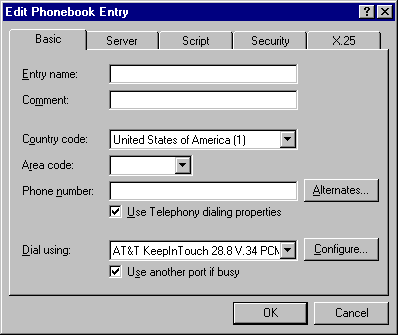
20) Click on the “Configure” button to see the
screen below.
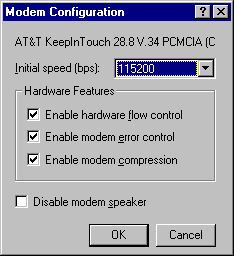
Select the options shown above and click on OK to go back to
the previous screen.
21) Then click on the “Server” tab and select the
options show below.
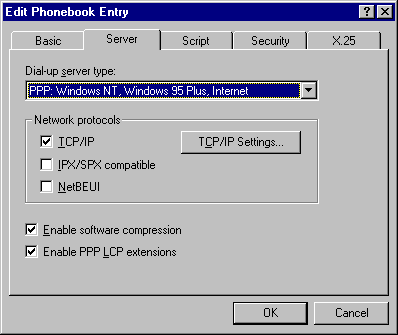
22) Click on the “TCP/IP Settings” button and select
the options shown below.
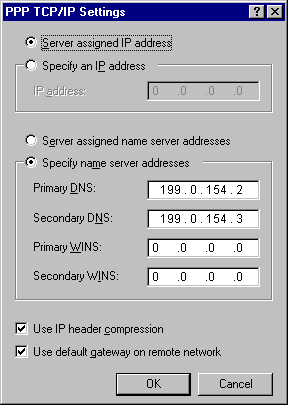
Click on the “OK” to go back to the screen shown in
step 21) and
23) Select the “Script” tab and select the options
shown below.
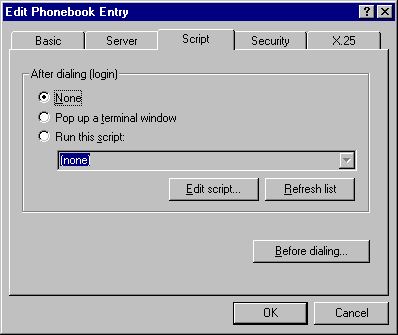
Click on the “OK” button to go back to the screen
shown in step 21)
24) Click on the “Security” tab and select the options
shown below.
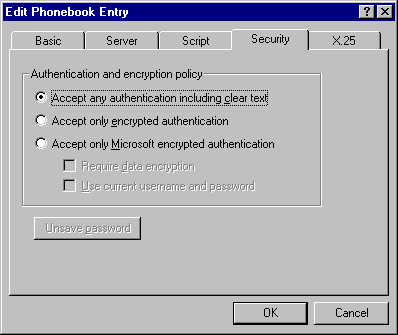
NOTE: A few folks have had a problem logging in using the
above configuration. If you do, you might want to select the
"Accept
only encrypted authentication" option above.
25) Click on the “X.25” tab and select the options
shown below.
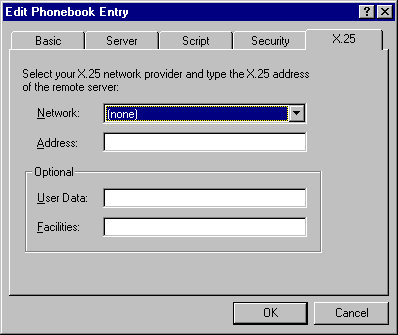
Clock on the “OK” button. You are now done setting
up the RAS configuration.
26) You will now see the screen shown below.
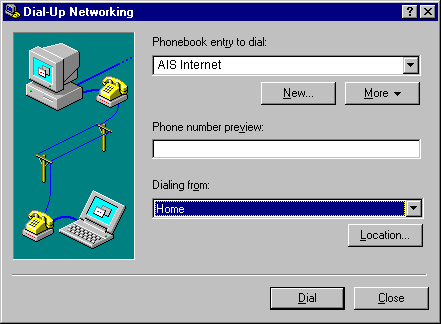
Click on the “Dial” button to begin the connection
to AIS.
27) Enter your AIS “UserName” and “Password”.
If you would like to save the password for the next session, make
sure that
“Save Password” option is selected.
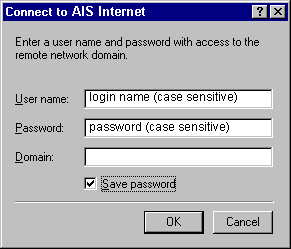
You will now need to enter your user name (as shown above) and
your password that you have for AIS (you probably got this
from a customer care representative when setting up your account)
Click on the “OK” button.
HAPPY NETTING
Comments and Suggestions
If you have comments on the above instructions, please send them
us via email: mailto:[email protected]